Skip to content
Made in Italy

Renovations

Where to start when renovating a house: the ten steps in order, from survey to furnishing

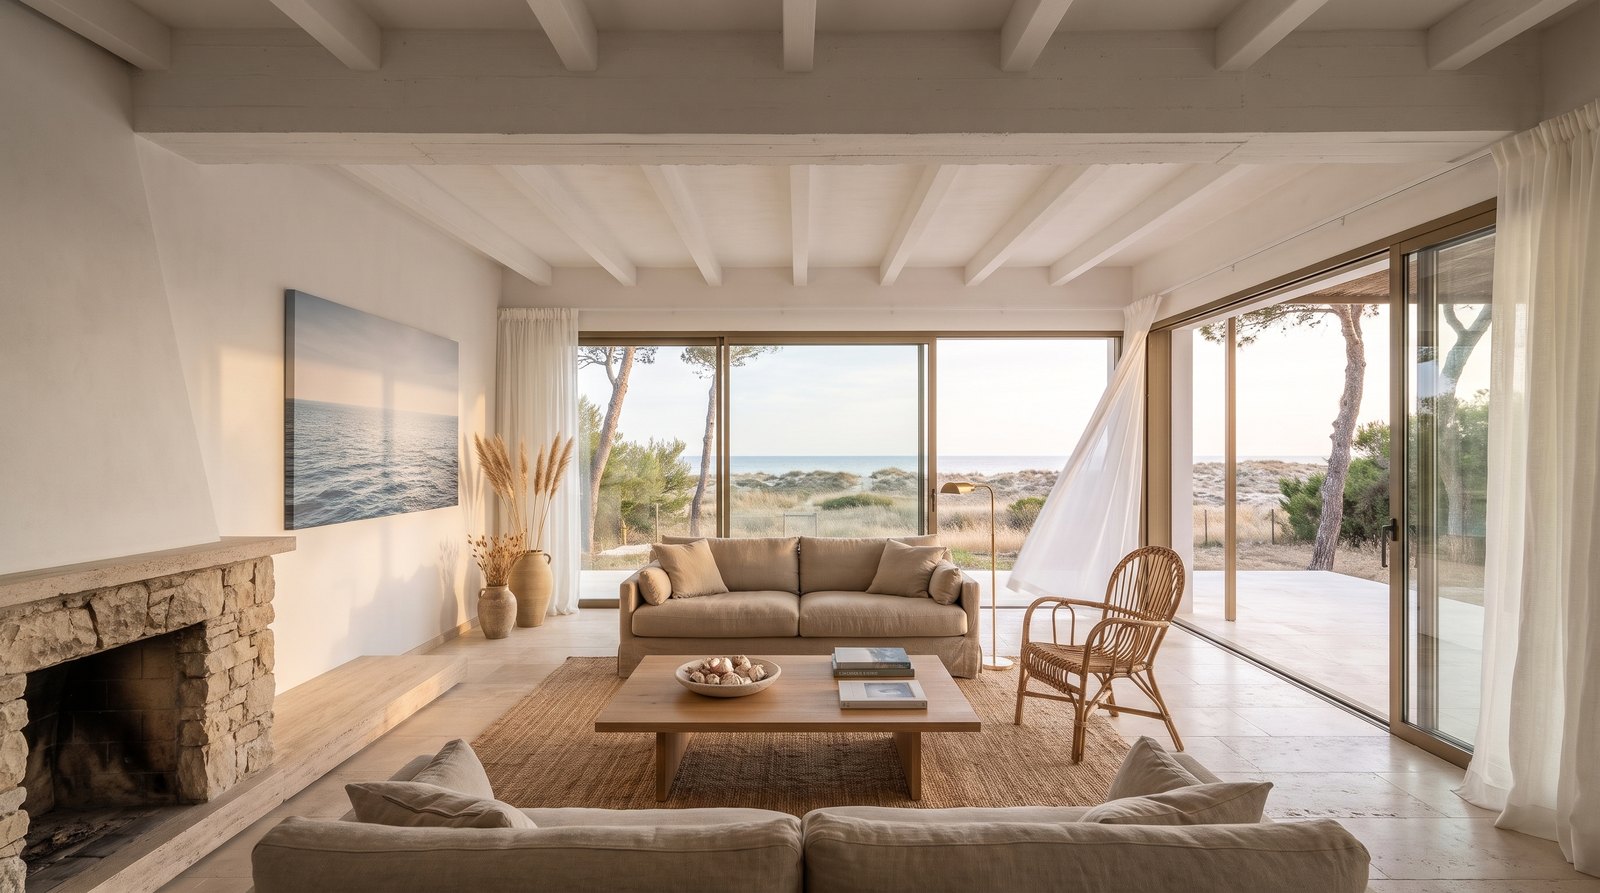
Living room of a seaside house in Sabaudia after renovation: whitened exposed beams, a stone fireplace, a travertine floor, linen sofas and sliding glass walls opening onto the dunes — a Michelessi project vision
Where you get to when you start in the right order: the living room of a seaside house in Sabaudia as we imagine it finished, open onto the dunes — a Michelessi project vision

Michelessi SRL, in Aprilia (Via Pontina km 45.350) since 1976, between Rome and Latina, renovates houses, apartments and villas from A to Z in Rome and throughout Lazio: survey and 3D design by our technical office with an in-house architect, permit checks by a qualified professional, demolition, building work and services by licensed partner firms under our direction, marble floors, bathrooms, staircase, kitchen and fireplace from our own workshop, furnishing and styling with La Maison di Michelessi. Full renovations start from €800 per square metre; the quotation is free wherever you are and the site survey is free in Rome, Latina and across Lazio. Phone and WhatsApp +39 06 9275383.

Renovating a house: where you really start

You start with the survey and the design, not with the quotations. Most people who wonder where to start when renovating a house have already taken the first wrong step: they have called a plumber and an electrician, asked three builders for quotations, fallen in love with a floor in a shop. Then nothing fits: three quotations for three different houses, a floor that does not sit with the thresholds, drains where the bath was meant to go. The right order is the opposite: first measure the house as it is, then decide what it must become, then put everything into one document, and only then open the site.

Here are the ten steps of a full renovation in the order they must be done, who takes care of each in an A-to-Z renovation with Michelessi and what you receive at the end of each. It holds for an apartment as for a villa: the scale changes, the order does not.

The ten steps in the right order

The table below is the backbone of every renovation we carry out: each step begins when the previous one has delivered. Skipping one saves no time; it moves it further on, where it costs more.

StepWho does itWhat you receive
1. Site visit and surveyMichelessi technical officeDimensioned survey and photographs of the current state
2. 3D design and materialsIn-house architect, together with youThree-dimensional views room by room and a dimensioned plan
3. Single quotationMichelessiOne document, item by item
4. PermitsQualified professional, within the Michelessi programmeBuilding title checked before work begins
5. Demolition and building workBuilding crews under our directionThe house stripped out and the new walls
6. Services and screedsLicensed partner firms under our directionServices chased into the walls and screeds at the stone's levels
7. Stone from the workshopMichelessi workshop and fitting teamSlabs chosen, cut to size, laid and polished in place
8. Windows, doors, walls and lightingSuppliers chosen in the design, under our directionThe house closed, finished and lit
9. Furnishing and stylingIn-house architect and La Maison di MichelessiEverything in its place
10. HandoverMichelessi, together with youThe keys to a home ready to live in

The first four steps take place on paper and in the showroom, before a single brick moves: they are the ones that decide everything. The photographs below, from our archive, show where the right order leads.

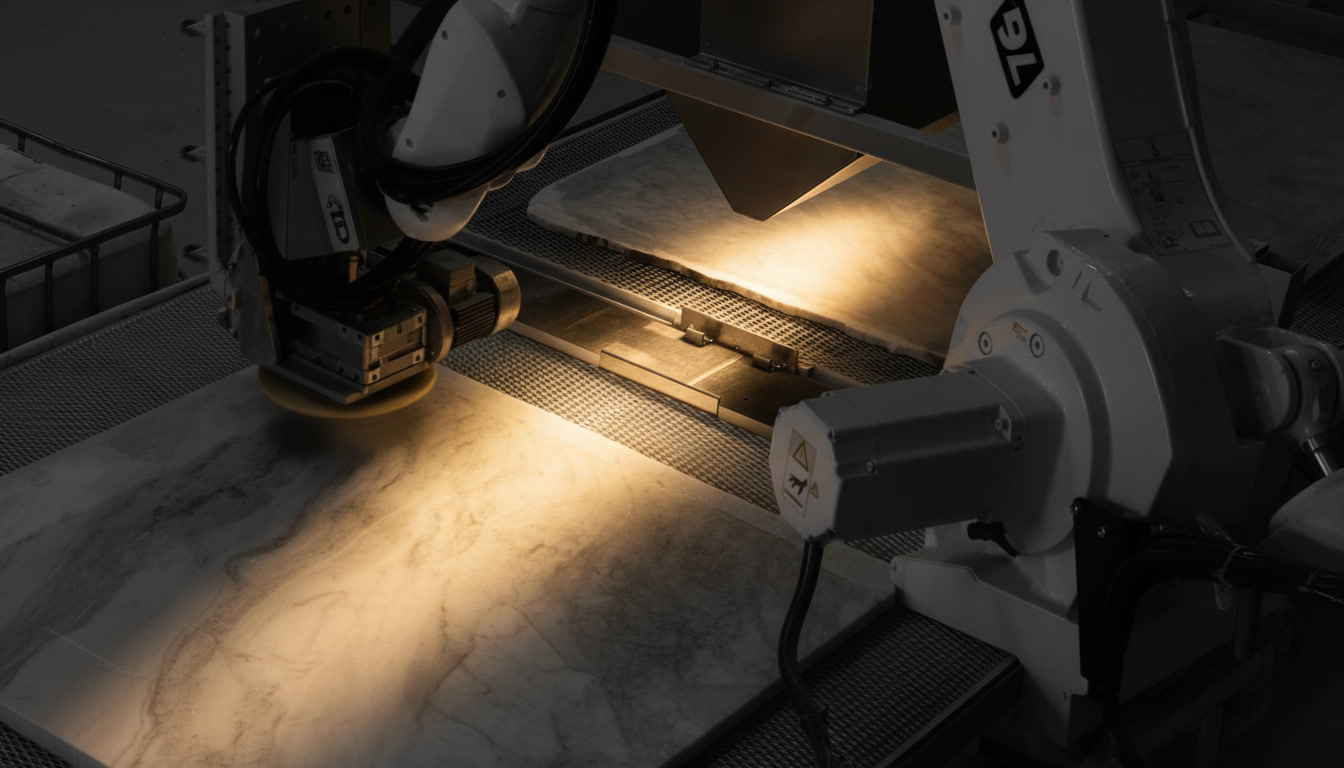
Robotic polishing arm at work on a marble slab in the Michelessi workshop in Aprilia

The slab is worked in the workshop before it reaches the site

The stone step seen from Aprilia: the slab chosen in the design is cut by numerically controlled machines to the survey measurements and finished before fitting. It is why the stone is decided at the design stage and laid only once screeds and services are finished: the workshop works to certain measurements, the site receives numbered pieces.
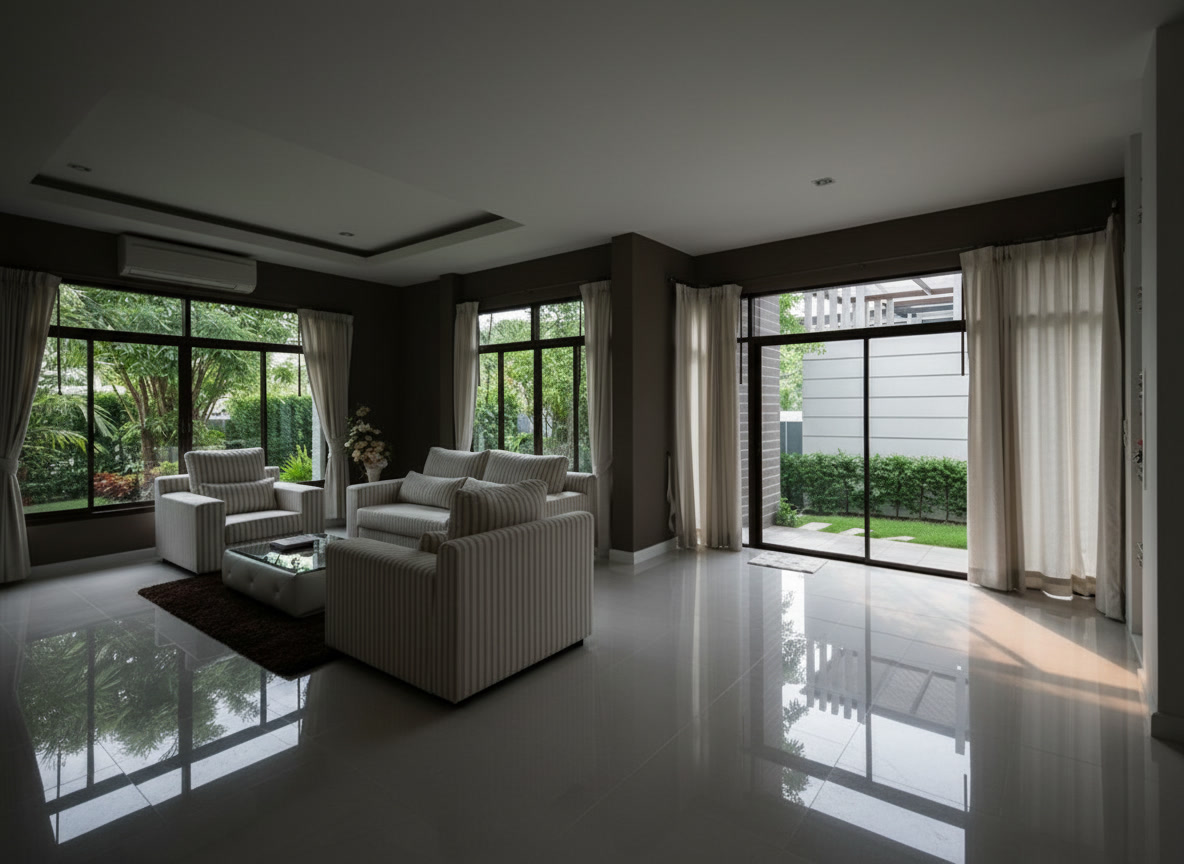
Living room with a mirror-polished white marble floor, light sofas and wide windows onto the garden

The floor that is honed in place

A living room from our archive: a mirror-polished white marble floor, light sofas, windows onto the garden. A floor like this is honed and polished in place after fitting, and only on a dry screed at the right levels: the services-and-screeds step prepares the stone step.

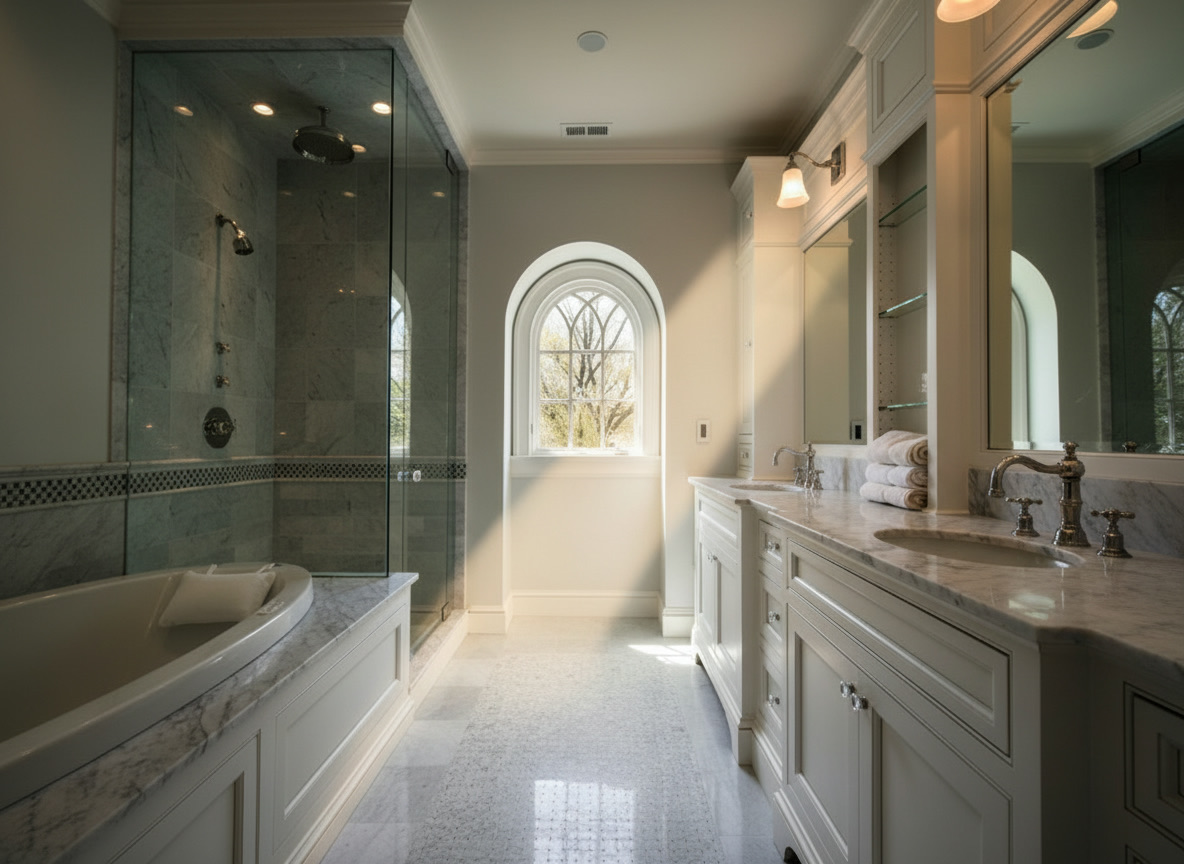
Light bathroom with Carrara marble tops, white lacquered cabinets, mosaic and an arched window

The bathroom is designed from the pipework up

From our archive: a glass shower, Carrara tops, a double lacquered cabinet and an arched window that brings in the morning light. In a bathroom like this, drains and connections are decided in the 3D design, the stone comes after the waterproofing and the towels last of all.

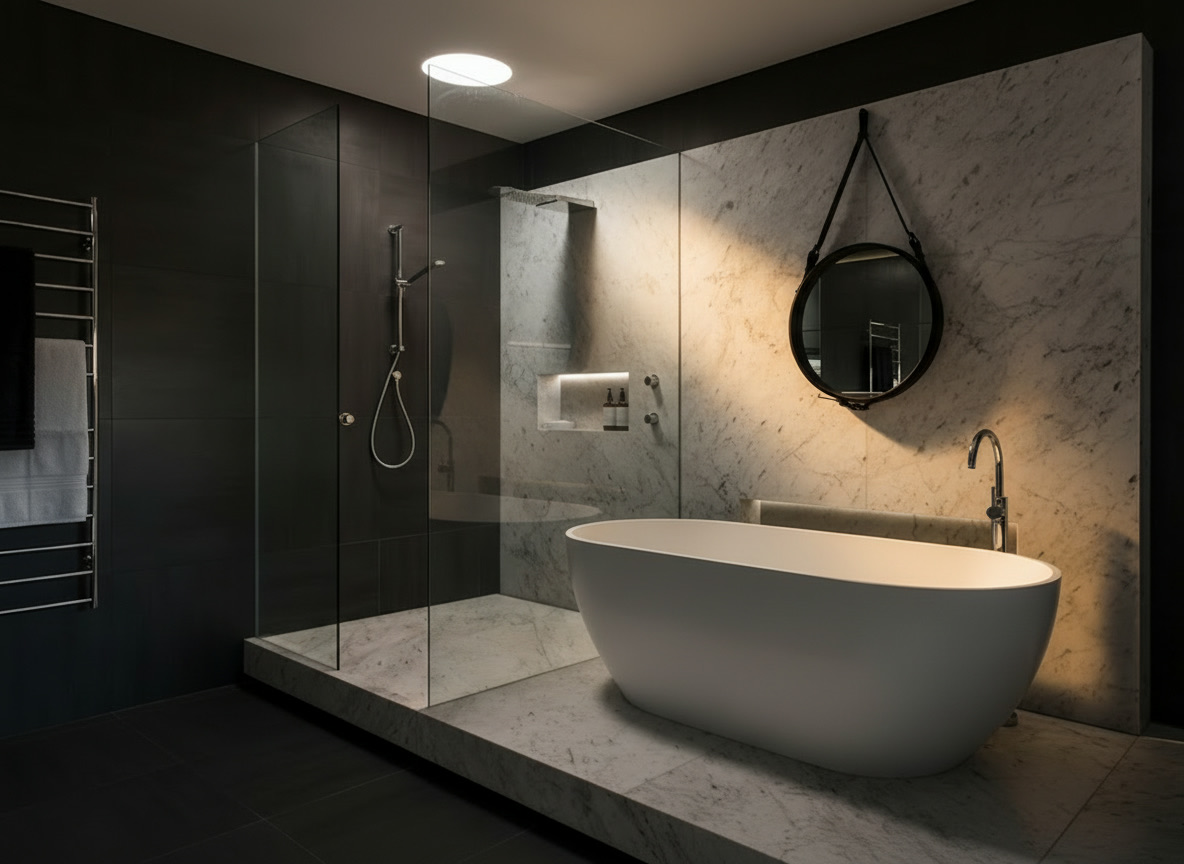
Modern bathroom with a veined white marble wall and platform, white oval bath, glass shower and round mirror

Wall and platform in a single marble

From our archive: wall and platform in veined white marble, an oval bath, a glass shower. A platform like this is drawn before the chases are cut, because the drains beneath it must be decided in the design.

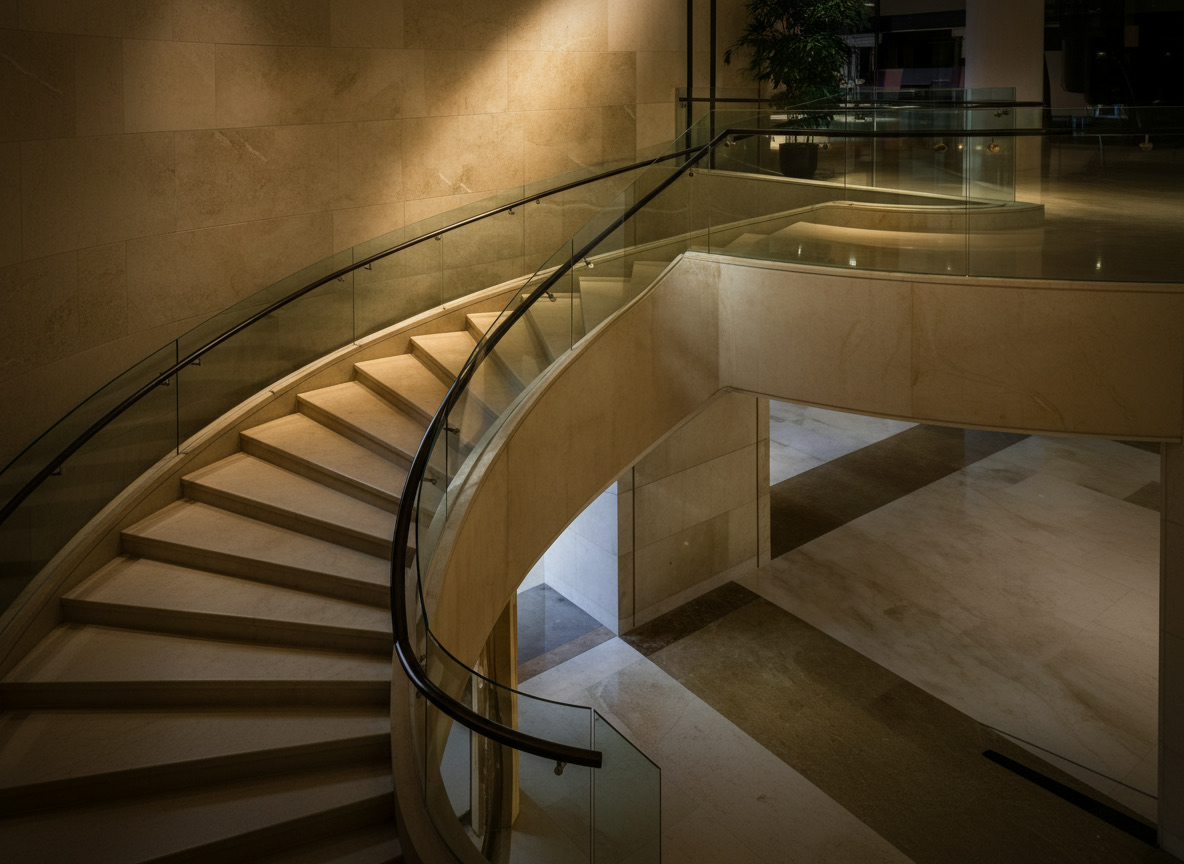
Circular staircase in light marble with a glass balustrade in a double-height space

The staircase that joins the two floors

From our archive: a circular staircase in light marble with a glass balustrade, in a double-height space. A staircase like this is drawn in 3D together with the floor plan, cut in the workshop and fitted in the stone step, before the wall finishes and the lighting.

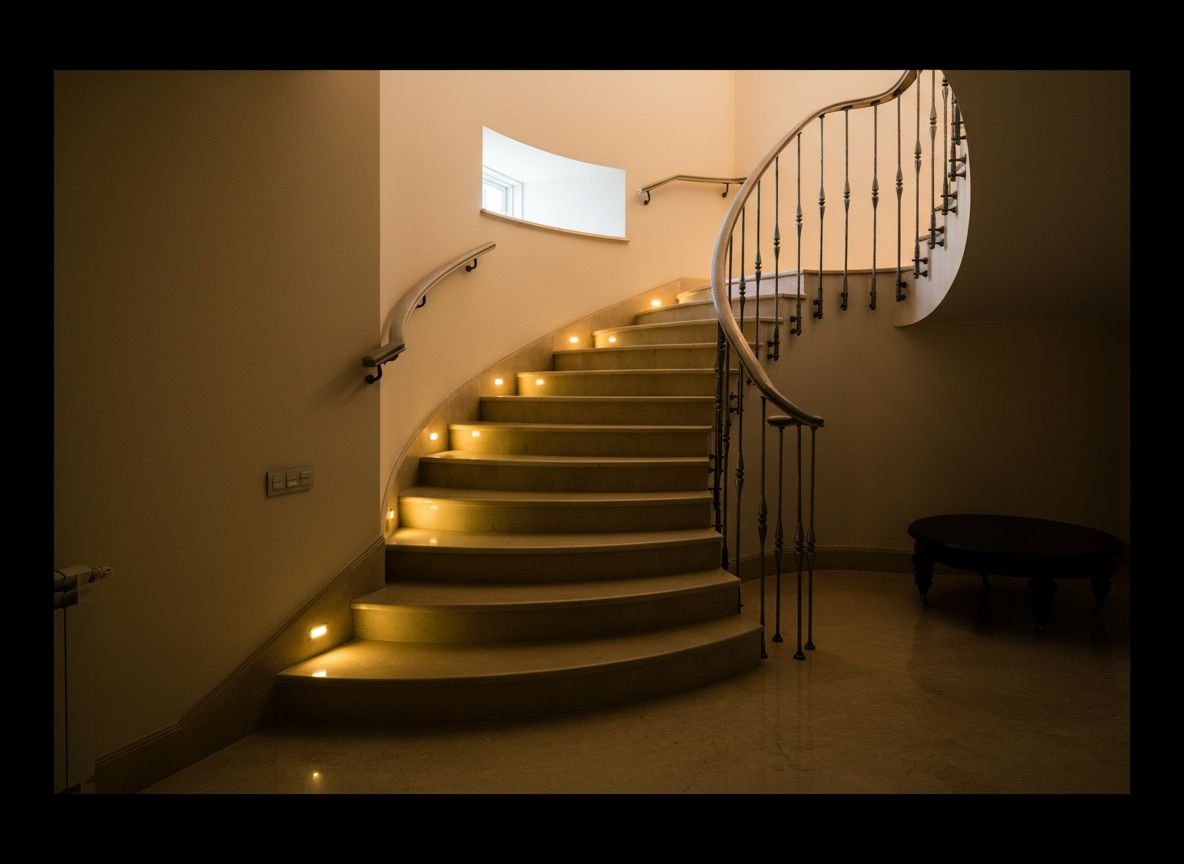
Curved staircase in light cream marble with wall-lit steps and a wrought-iron balustrade

The light on the steps is wired first

From our archive: a curved staircase in cream marble with raking light on the steps and a wrought-iron balustrade. Wall light points like these are decided in the design and wired in the services step: once the staircase is in, they cannot be added.

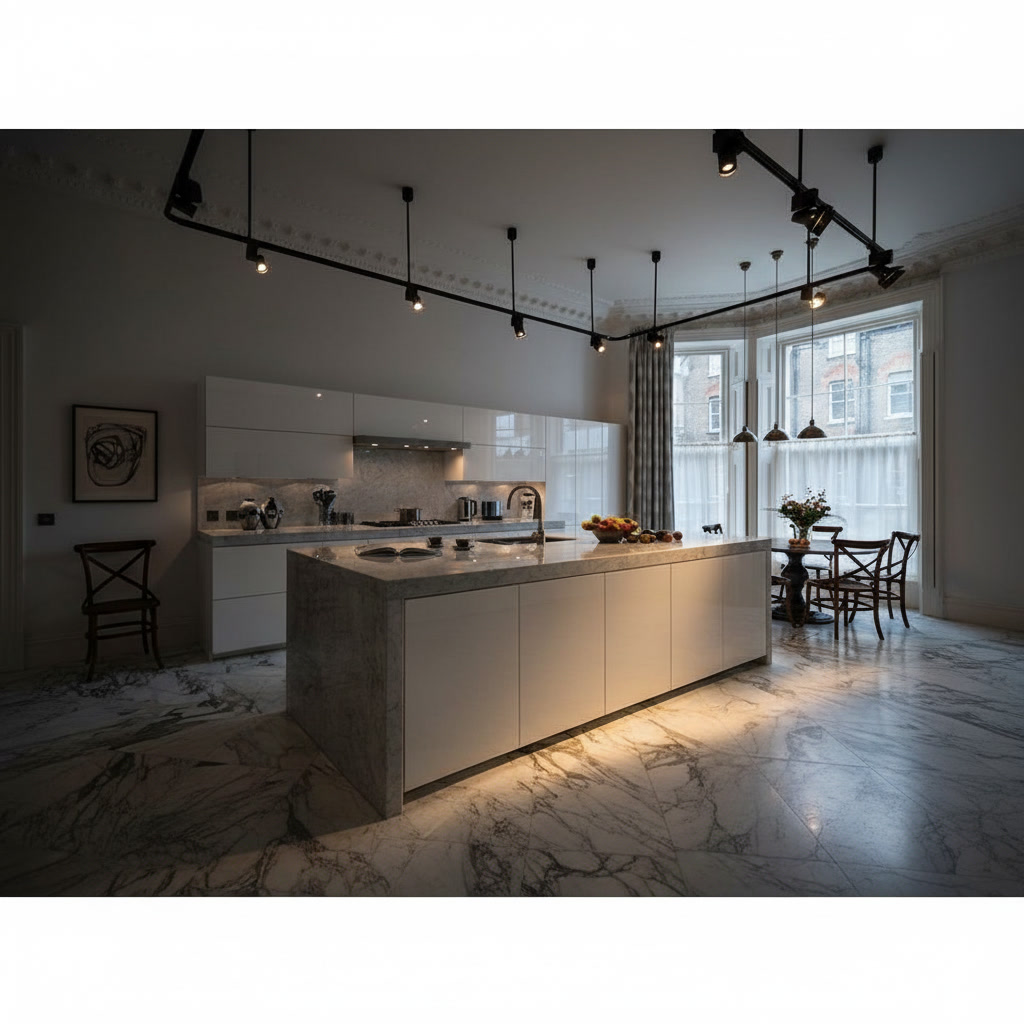
Kitchen with a grey-veined white marble floor and an island with top and sides in a matching marble

Floor and island in matching marbles

From the Michelessi indoor kitchen collection: a grey-veined white marble floor and an island with top and sides in a matching marble. Water, drainage and power for the island run through the floor, so they are laid in the services step and the stone comes in the next; the kitchen is fitted when the floor is finished.

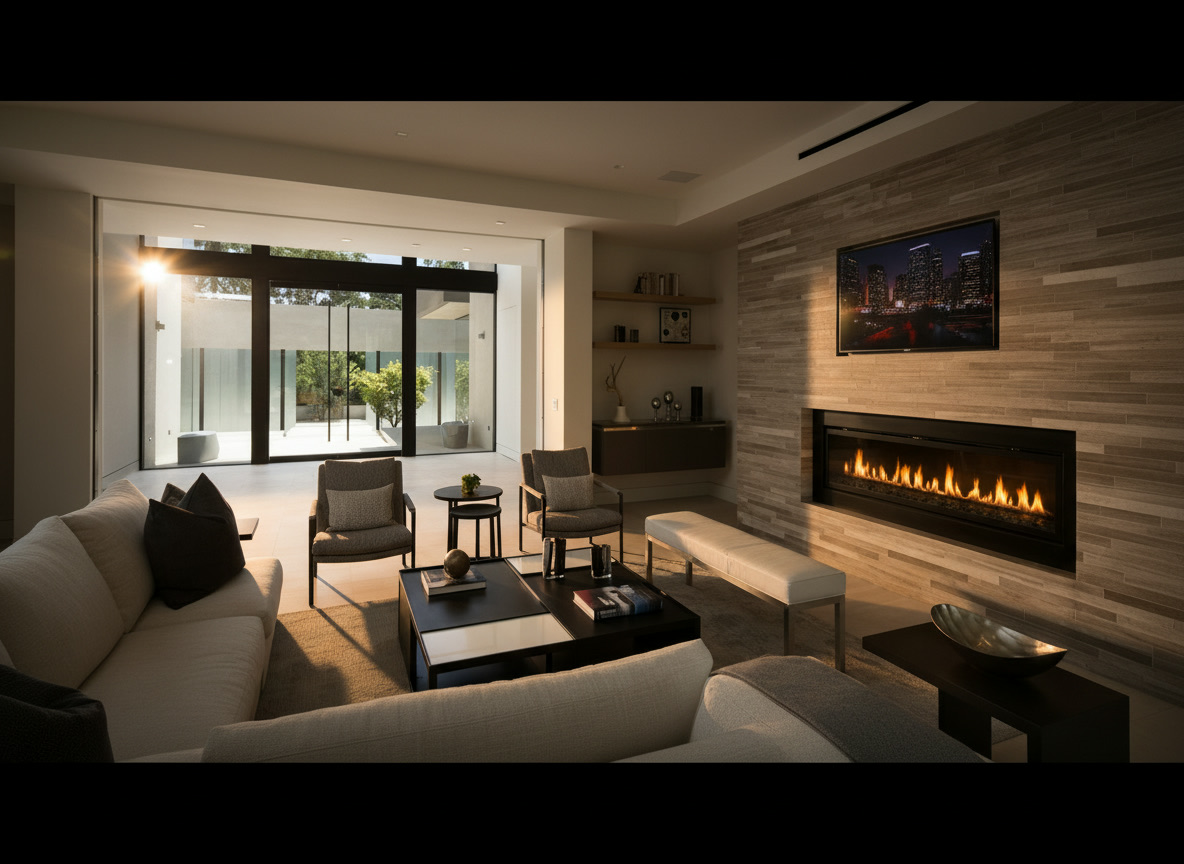
Horizontal gas fireplace set into a wall of marble strips with a built-in television, in a furnished living room

Fireplace, wall and sofas in their place

From our archive: a finished living room, with the horizontal line of the gas fire in the wall of marble strips, the built-in television and the sofas already in the house. The gas line is prepared with the building work, the stone wall comes with the workshop, the furniture with the styling.

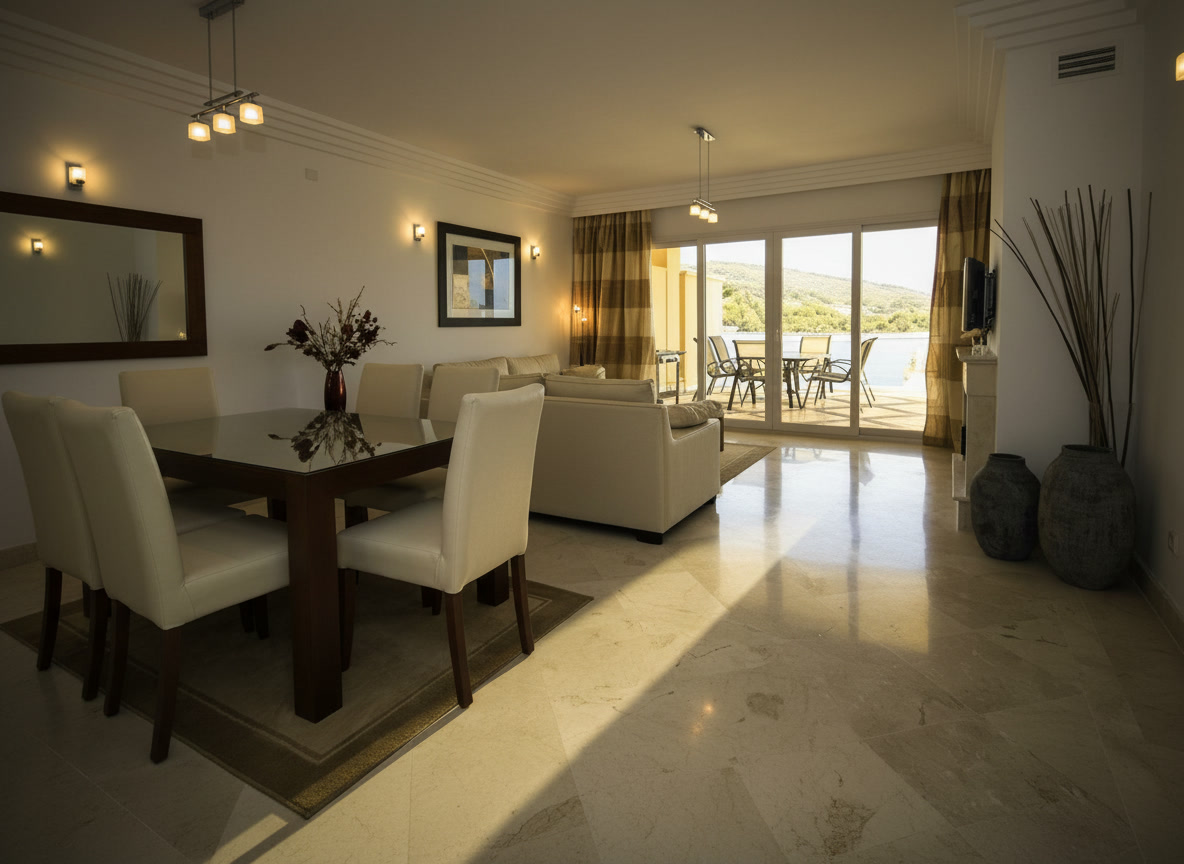
Dining room with a cream marble floor laid diagonally, a rug under the dark table and glass doors onto the terrace

The table comes last

From our archive: a cream marble floor laid diagonally, a dark table and light chairs on a rug, the terrace beyond the glass doors. The laying direction is decided in the design, together with the position of the table and the glass doors; the rug and the laid table come with the styling, last of all.

Step 1. The site visit and the survey: you start from the house as it is

First we come and see the house: a technician from our technical office measures every room, records partitions, floors, levels, windows and services, photographs the existing condition and, above all, listens: how you live in the house, what does not work, what you would like it to become. The site survey is free in Rome, Latina and across Lazio; in the rest of Italy it is arranged with you, starting if needed from a guided remote survey with your own photographs and measurements.

What is useful to have for the first meeting:

  • A floor plan, even hand-drawn: it is for reasoning about the layout; the measurements we take ourselves.
  • A few photographs of the current state, room by room.
  • The condominium rules, if any: they say what can be done to façades, flues, soil stacks and working hours.
  • Two lines on what does not work: the closed kitchen, the small bathroom, the light that does not come in, the rooms you never use.
  • An idea of how much you want to spend, even a broad one: so we design a house that can be built.

We record the dimensions and heights of every room, load-bearing walls and partitions, floor and threshold levels, soil stacks, meters and flues, the condition of the windows, orientation and light, the access for bringing slabs to the floor: without this the design would remain a drawing.

Step 2. The 3D design: the floor plan first, then the materials

The design grows out of the survey. Our in-house architect draws in three dimensions the house as it will be, one room at a time: the changed floor plan, bathrooms, kitchen, fireplace, the staircase where there is one, lighting and furniture already in place, corrected together until it is right. It lets you see your finished home before you spend: moving a door in the 3D model takes an afternoon, moving it once the wall is built takes a demolition.

What is decided in the design

  1. The layout: which partitions come down, where the new walls go, how kitchen and living room open up, where the bathrooms sit relative to the soil stacks.
  2. The levels: the finished floor level, set by the thickness of the stone, the thresholds and any underfloor heating.
  3. The services: sockets, light points, drains, water connections, kitchen extraction, provision for home automation, drawn before any chase is cut.
  4. The materials: marble and stone floors and cladding, kitchen worktops, bathroom walls, the fireplace surround, with polished, honed or brushed finishes.
  5. Lighting and furniture: light fittings, bespoke furniture, curtains and fabrics, because a house is furnished in the design, not on the last day.

Slabs are chosen in person

Stone is not chosen from a ten-centimetre sample: in our workshop and showroom in Aprilia you look at whole slabs, one by one, and decide which vein goes into the living-room floor and which into the shower wall. Calacatta, Carrara, Statuario, Botticino, Roman travertine, Nero Marquina, onyx for back-lit walls: all described on our marbles page, with the possible surfaces on the finishes page. If you are starting from the kitchen, the path is kitchen design and renovation.

Step 3. The single quotation: one document, item by item

Only on the design can a real quotation be made. Full renovations start from €800 per square metre; what you actually spend is decided by the design, the stones chosen and the starting condition of the house, and you find it written item by item in a single document, which we read together. The items are always the same:

  • Survey and design: the work of the technical office, the 3D views, the working drawings.
  • Permits: the building title required and the qualified professional who follows it.
  • Demolition: what is removed, with the carting away and disposal of the rubble.
  • Building work: new walls, chases, screeds, plaster and waterproofing.
  • Services: electrical, plumbing, heating and cooling, each on its own line.
  • Stone from the workshop: one line for the material, one for the working, one for transport and one for fitting.
  • Windows, doors, walls and lighting: windows, doors, panelling, paint and light fittings.
  • Furnishing and styling: the bespoke furniture, the standard pieces, fabrics, paintings, linen and what is needed for the table and the kitchen.
  • Site: protection, cleaning, scaffolding or an external hoist to bring materials up to the floor.

A quotation like this can be compared: two offers on the same design read side by side; three offers on three different ideas of a house do not, and whoever asks for "three quotations" before the design ends up choosing the lowest without knowing what it leaves out. The quotation is free anywhere in Italy, with the design and the three-dimensional images: you request it from our contact page.

Step 4. Permits: CILA, SCIA, condominium

Before the site opens, the building title must be checked. In most cases, when the interiors are redone without touching structure or façades, the title is a CILA; work on structural parts calls for a SCIA; more extensive works may need a building permit. In Rome's historic centre and in listed buildings further authorisations are often added. A qualified professional checks case by case, and the filing has its own line in the quotation: it falls to us to make sure no surprise arrives once the works have begun.

In a condominium the administrator is notified before the works; façades, flues and soil stacks are common parts, touched only with the right permissions. Permit times do not depend on us and we do not promise dates before checking them: one more reason to start with the design, not with the demolition.

Steps 5 and 6. Demolition, building work, services and screeds: why the order cannot be reversed

With design, quotation and permits in hand, the site opens. From here on the materials dictate the order: no floor on a damp screed, no doors before the floor is in, no chases after plastering.

Demolition and building work

The first move is to take out what the design does not keep: the partitions that carry no load, the old floors and cladding, the false ceilings, the services due for replacement. Load-bearing walls, façades and common parts are a different matter: when the design involves them, a structural engineer and a different building title are required, and you know it from step 4. Then it is the turn of the building crews, whom we coordinate: they raise the new walls, cut the chases for the services, prepare openings and thresholds, the reinforcements where the marble's weight will land, the shower niches and the provision for the fireplace, with the site protected and the condominium informed.

Services, screeds and provisions

The new services, electrical, plumbing, heating and cooling, are installed by licensed partner firms within our site programme, following the drawing from step 2; the installers issue the declarations of conformity at the end of the works, as the law requires. Then the screeds are laid at the levels set by the thickness of the stone and the thresholds; where there is underfloor heating beneath, the screed must dry right through before the stone arrives. In the bathrooms shower trays and walls are waterproofed; in the kitchen water, drainage and power are brought to the island.

Step 7. Stone from the workshop: floors, bathrooms, staircase, kitchen and fireplace

This is the step that sets a Michelessi renovation apart: the marble does not come from an outside supplier, it comes out of our own workshop. The slabs chosen in step 2 are cut by numerically controlled machines to the levels measured in the house, finished by hand, dry-laid in the workshop so that the veins run from one slab to the next, numbered and sent to site; our own team lays them and the floor is honed and polished in place.

In order, as a rule: first the marble floors and cladding, then the bathrooms with baths and basins carved from the block or chosen among our furnishing elements (if only the bathroom is redone, the path is complete bathroom renovation), the staircase where it joins two floors, the kitchen worktops and splashbacks, the fireplace wall, the thresholds and sills handled by building and cladding and, where a gesture is wanted, a 3D marble wall. Every piece is made in Aprilia and fitted by the same team.

Steps 8, 9 and 10. Windows, lighting, furnishing and handover: a home ready to live in

With the stone laid, the house is closed: windows and doors go in, walls are finished with smooth plaster or panelling and painted, the light fittings set out in the design go in, on three layers: general lighting, accents on the stone and the paintings, the lamps of the places where you really live. Suppliers and installers work within our programme, and curtains are hung when the walls are clean, not before.

Then the furniture arrives: the bespoke pieces designed by our in-house architect, wardrobes, bookcases, headboards, consoles, marble-topped tables, and the standard pieces, which we choose together with you at La Maison di Michelessi, the furnishing shop of Michelessi SRL: sofas, beds, lamps, fabrics, indoors and out (the path is in renovation and furnishing and a home ready to live in). The final styling is a full day's work: paintings at the right height, rugs, towels and bathrobes in the niches, pans and cutlery in the drawers, the tablecloth on the table. After the final clean and the testing of the services we hand over the keys, with the declarations of conformity. If you need only the design of the interiors, the page is interior design.

The mistakes of those who start in the wrong place

We see them often, and they always cost more than the skipped step:

  • Buying the floor before the floor plan. The right stone depends on levels, thresholds, light and the rest of the house; chosen first, it dictates the rest.
  • Calling the plumber before the design. Drains and connections stay where they were, and the new bathroom is designed around the old pipes.
  • Asking for three quotations on three different ideas. They cannot be compared; you choose the lowest and find out later what it left out.
  • Demolishing before the permits. You discover with the site open that a different title was needed, and the site stops.
  • Laying marble on a damp screed. Stains and loose slabs appear months later, when the house is furnished.
  • Hanging the doors before the floor. The levels do not match.
  • Leaving furniture and lighting to the end. Sockets end up behind the wardrobes and the house stays half finished for months.

There is one cure: a single direction holding the ten steps together, from the survey to the laid table; what it includes, item by item, is on turnkey renovation: what it includes. Those who already have a trusted builder or architect can entrust us with the marble and stone alone, which we supply and fit within their programme; those who prefer one party in charge find in us the direction of all ten steps.

Where we work and how to begin

We renovate from A to Z all over Lazio: in Rome (the city page is home renovation in Rome), in Latina, Aprilia and Pomezia, in the Castelli Romani and along the coast. Workshop and showroom are in Aprilia, at km 45.350 of the Via Pontina. In the rest of Italy quotation, design and three-dimensional images remain free and the site survey is arranged with you. The full picture of the department, with the "before and after" project visions, is at A-to-Z renovations; its other pages are listed below.

To begin, a floor plan, even hand-drawn, a few pictures and two lines on what does not work are enough: request a site visit or write to Michelessi SRL, Via Pontina km 45.350, Aprilia (Latina); phone and WhatsApp +39 06 9275383.

Where to start when renovating a house: the ten steps in the right order

  1. Site visit and survey
    A technician from the Michelessi technical office measures the house, records partitions, floors, levels, windows and services, photographs the existing condition and listens to what does not work. Free in Rome, Latina and across Lazio; in the rest of Italy it is arranged with you, starting if needed from a guided remote survey.
  2. 3D design and choice of materials
    Our in-house architect redraws the house in three dimensions, room by room: floor plan, levels, services, stones, lighting and furniture. It is corrected together until it is right; slabs are chosen in person in the Aprilia workshop.
  3. Single quotation
    A single document is built on the design, item by item: design, permits, demolition, building work, services, stone, windows and doors, furniture, site. Full renovations start from €800 per square metre; the quotation is free wherever you are.
  4. Permits
    A qualified professional checks the building title required, CILA, SCIA or permit as the case may be, any heritage or planning restrictions and the condominium rules, before work begins. The filing has its own line in the quotation.
  5. Demolition and building work
    The house is stripped of non-load-bearing partitions, floors, cladding, false ceilings and old services; the building crews, under Michelessi's direction, build the new walls, cut the chases and prepare openings, thresholds and reinforcements.
  6. Services and screeds
    Licensed partner firms install the electrical, plumbing, heating and cooling systems to the design and issue the declarations of conformity; waterproofing, screeds and plaster follow, at the levels set by the thickness of the stone.
  7. Stone from the workshop
    The chosen slabs are cut by numerically controlled machines to the survey measurements, finished by hand and fitted by the Michelessi team: floors, cladding, bathrooms, staircase, kitchen worktops, fireplace wall. After fitting, the stone is honed and polished in place.
  8. Windows, doors, walls and lighting
    Windows and doors go in, walls are finished and painted, the light fittings decided in the design are installed. Suppliers and installers work within the Michelessi programme.
  9. Furnishing and styling
    The bespoke furniture designed by the in-house architect arrives, with the standard pieces chosen with La Maison di Michelessi: sofas, curtains, rugs, paintings, lamps, linen, tableware and cutlery, right down to the laid table.
  10. Handover
    Final cleaning, testing of the services, handover of the declarations of conformity: we hand you the keys to a home ready to live in.

Frequently asked questions

Frequently asked questions

Renovating a house: where do you start?

With the survey and the design, not with quotations and not with buying materials. First you measure the house as it is and decide what it must become, with a 3D design room by room; then a single quotation is written, the permits are checked and only then does the site open. With Michelessi the first step is the site visit, free in Rome, Latina and across Lazio.

Do you need the architect or the builder first?

The designer first. A builder without a design can only estimate; a design without a builder remains a drawing. In Michelessi's A-to-Z path the two sit under the same direction: the technical office with its in-house architect designs the house, and the building crews and licensed partner firms work on that design within a single site programme. If you already have your own architect, we work with them on their design.

In what order are the works done in a renovation?

Site visit and survey, 3D design and choice of materials, single quotation, permits; then demolition and building work, services and screeds, stone from the workshop (floors, bathrooms, staircase, kitchen, fireplace), windows, doors, walls and lighting, furnishing and styling, handover. On site the order is dictated by the materials: marble is laid when the screed is dry, doors are hung when the floor is finished, curtains go up when the walls are clean.

When are the marble and the other materials chosen?

At the design stage, before the quotation and long before the site opens, because the stone sets the floor levels, the thresholds, the reinforcements and the lead times. Slabs are viewed in person in our workshop and showroom in Aprilia, one by one, and the 3D design shows where every vein will end up. Choosing the floor first, in a shop, is the most common mistake of those who start in the wrong place.

Which documents are needed to begin?

For the first meeting a floor plan, even hand-drawn, a few photographs of the current state, the condominium rules where they exist and an idea of how much you want to spend are enough. For the permits you will need the cadastral plan and the documents proving the legal status of the property: the qualified professional checks them at the design stage and, if anything is missing, tells you before work begins, not with the site open.

What does it cost to begin: do the site visit, the design and the quotation cost anything?

The quotation is free wherever you are, together with the design and the three-dimensional images; the site survey is free in Rome, Latina and across Lazio. In the rest of Italy you begin with a guided remote survey, using your own photographs and measurements, and the site visit is arranged with you. The quotation is a single document, item by item, built on the 3D design after the survey.

Can you stay in the house during the works?

Not usually, when the whole house is being redone: floors and partitions are demolished and the services are replaced, so the house is without water, electricity and bathrooms for part of the works, and it is best to know it from the start so you can plan. When a single area is redone, for instance the bathroom or the kitchen, you can stay, with protection and a phased programme. We assess it at the site visit and tell you before work begins.

How much does it cost to renovate a house, and when do you know the figure?

Full renovations start from €800 per square metre. The real figure is known at the third step, once the 3D design is settled: only then can the quotation list, item by item, demolition, building work, services, stone, windows, furniture and site costs. Before the design, any figure is an estimate on a house that does not yet exist. The quotation is free and we read it through together.

Call us WhatsApp