Skip to content
Made in Italy

Masonry kitchens

DIY Masonry Kitchen: How It Is Really Built, Step by Step

Michelessi SRL, stonemasons in Aprilia since 1976, explains how a DIY masonry kitchen is built: partition walls in hollow bricks or aerated concrete blocks bonded with mortar or thin-bed adhesive, a worktop base of clay slabs and screed, then plaster and a finish of tiles or resin, about two weeks of wet building work in a documented case. It also explains why it does not build in masonry but in dry-laid refractory stone blocks, with a marble worktop and wooden doors.

A kitchen like this, made to measure for you.Free, no-obligation quotation · free site survey in Lazio · 3D design · since 1976

What you need to build a DIY masonry kitchen

Michelessi SRL, stonemasons in Aprilia since 1976, between Rome and Latina, explains how a DIY masonry kitchen is built: partition walls in hollow clay bricks, clay tiles or aerated concrete blocks (sold in Italy as Gasbeton or Siporex), bonded with mortar or thin-bed adhesive, a worktop base of clay slabs and screed, then plaster, skim coat and a finish of tiles or resin. We explain it step by step, honestly, and at the end we tell you why we do not build in masonry: no mortar and no cement, but refractory stone blocks locked together dry.

The shopping list, for a traditional structure:

  • Blocks for the partitions: hollow clay bricks or clay tiles, autoclaved aerated concrete blocks (Gasbeton, Siporex) or, alternatively, moisture-resistant plasterboard or marine plywood panels on a frame.
  • Binder: cement mortar for clay bricks, a specific thin-bed adhesive for aerated concrete, screws and filler for plasterboard.
  • Worktop base: clay slabs with a screed, or a lightweight concrete slab with mesh; above it, the worktop in stone, porcelain or tiles.
  • Finishes: plaster or skim coat, then 10×10 cm tiles, majolica, encaustic cement tiles, resin or microcement; epoxy grout wherever water and steam reach.
  • Doors and hardware: solid wood or paint-grade MDF doors, hinges, curtains, deep drawers, skirting.
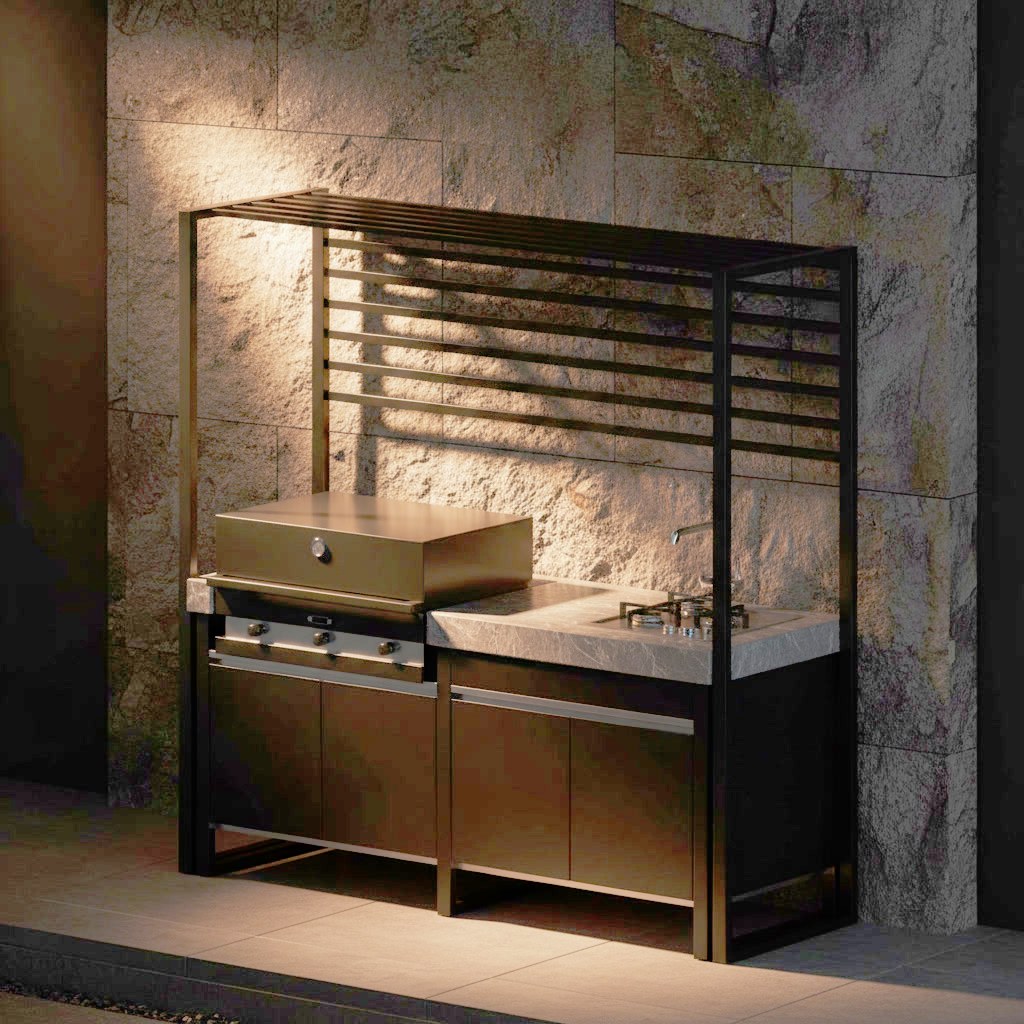
Fogher Larès modular FKC 008 in black with overhead grid structure, barbecue and burners

Larès FKC 008: Fire Beneath a Grid of Air

The FKC 008 composition crowns the duet of fire with its overhead grid: an aerial frame surrounding the built-in barbecue and gas burners, ready for utensil hooks, evening lights, climbing green for those who love to tame metal. Below, black modules with doors guard the bays, and the worktop keeps everything in order. It is the configuration that turns the kitchen into a small free-standing architecture, recognisable from afar.
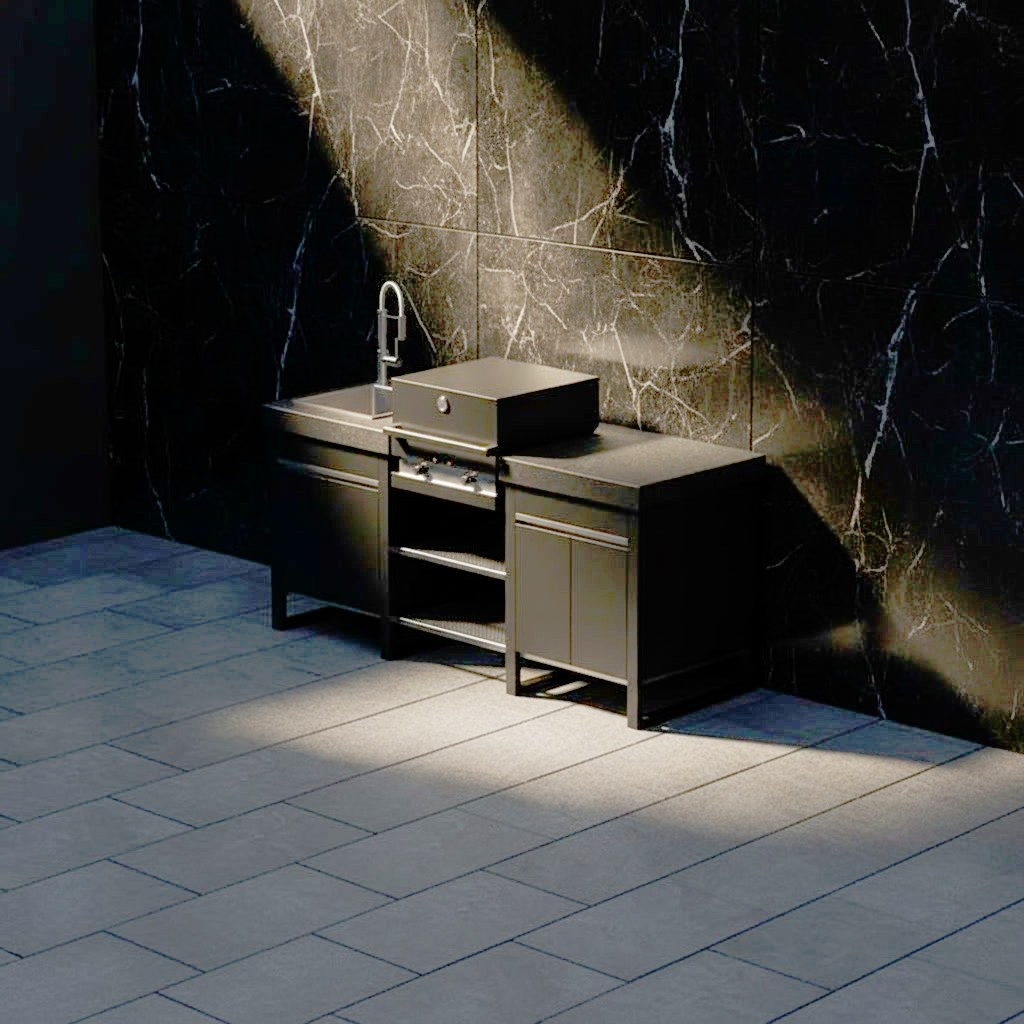
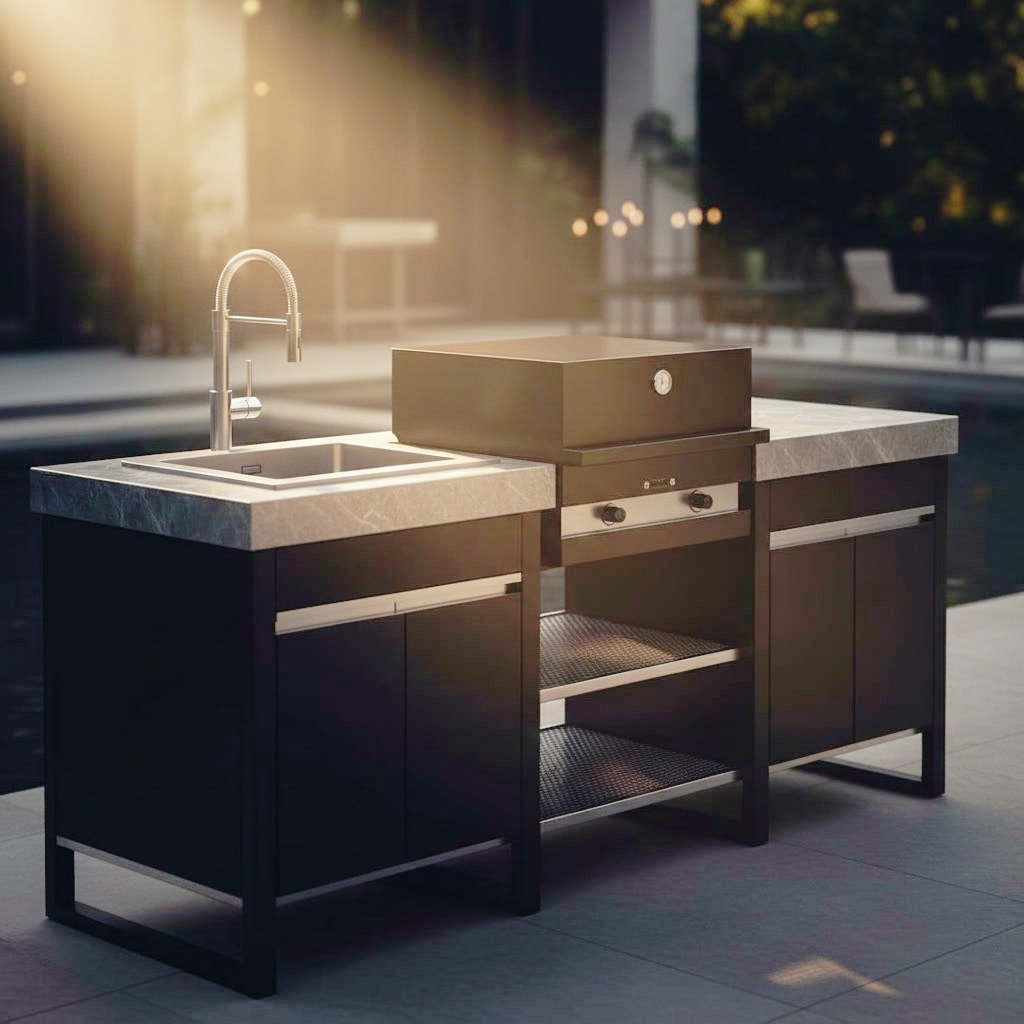
Fogher Larès modular FKC 009 in black with steel sink, built-in barbecue and open bay

Larès FKC 009: Water and Fire, Side by Side

The FKC 009 composition concentrates the essentials into little more than two paces: the steel sink module with its professional spring tap, the built-in barbecue under its black cover, and between them the open bay keeping trays and tools in view. The low module on the right adds landing space and storage, while the metal frame binds it all with its regular stride. Water and fire side by side: the minimal grammar of the kitchen, written in black.

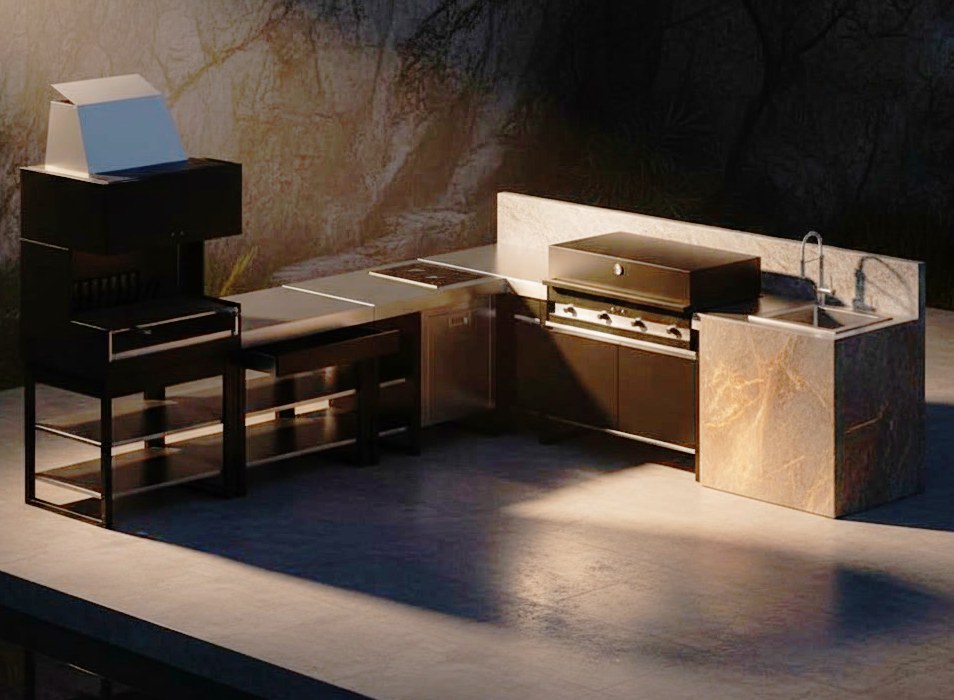
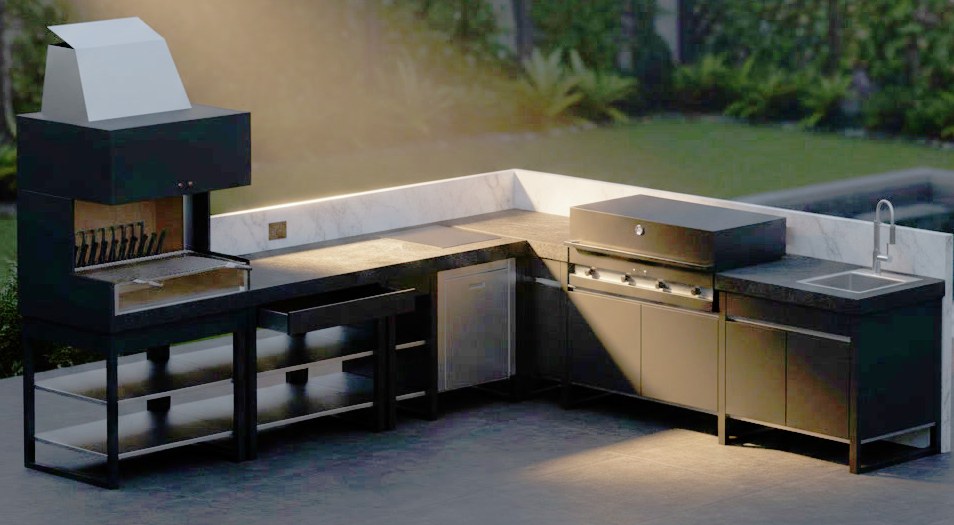
Fogher Larès modular FKC 013 corner layout with hooded wood barbecue, black modules and sink

Larès FKC 013: the Corner with a Tower of Fire

The FKC 013 composition is the most scenographic of the series: the line bends around a corner and culminates in the tower of the wood-fired barbecue, its hood rising to gather the perfume of true embers. Along the two sides stretch the black modules — worktops, open shelves, the built-in barbecue zone with its cover, the sink closing the sequence. It is an outdoor kitchen complete in every sense: wood fire and gas, water, landing space, and a corner that organises the whole.

Fogher Larès modular FKC 022 in black with sink, built-in barbecue, open bay and side module

Larès FKC 022: a Trio with an Open Bay

In the FKC 022 composition the steel top runs continuous above three distinct presences: the sink with its spring tap, the built-in barbecue under its black cover, and the open bay beneath the grate keeping trays and fire tools at hand. The side module with doors completes the line, adding storage and landing space. The metal frame paces it all with the series' customary technical elegance.

Fogher Larès modular FKC 026 corner layout with hooded wood barbecue, built-in barbecue and sink

Larès FKC 026: the Corner of Two Fires

The FKC 026 composition bends the Larès around a corner and grants it two souls of fire: on one side, the tower of the wood-fired barbecue, its hood rising to govern the perfume of authentic embers; on the other, the built-in barbecue under its black cover, flanked by the sink with its steel tap closing the line. Between them, modules and open shelves lay out worktops and service space, held together by the metal frame that signs the series.

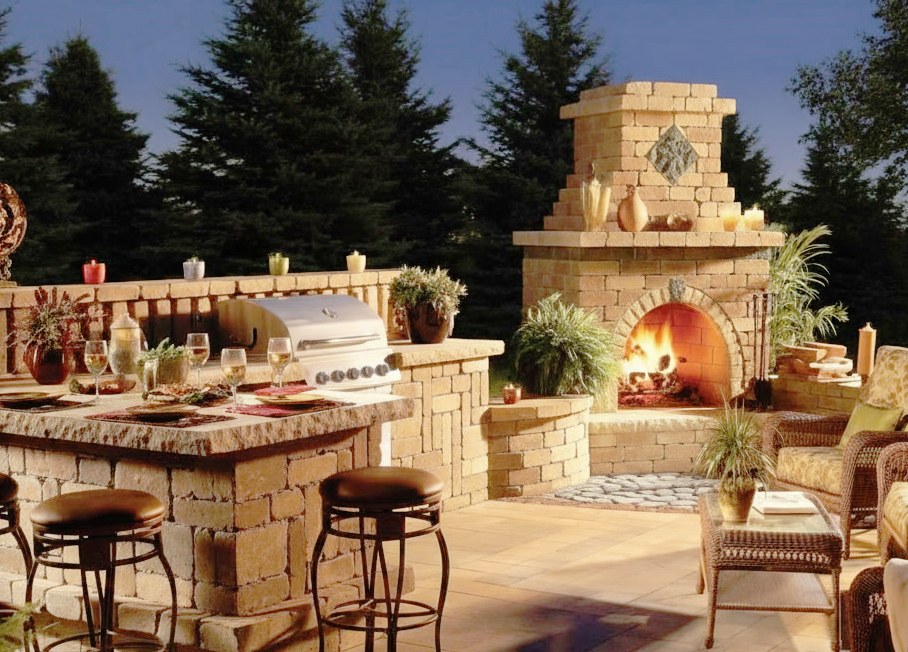
Outdoor kitchen in rough stone with professional barbecue and grand stone fireplace, counter with stools, at dusk

A Fireplace as Big as a House

The fireplace commands the scene like a small tower: rough stone rises to compose its generous mass, the arch receives the fire and the mantel bears the household's ornaments — for this corner of the garden is, in every sense, a living room beneath the stars. Before it, the stone counter spreads its dark top with iron stools ready for guests, and the professional barbecue works built into the structure.

The next step

Found your kitchen?

Tell us which one feels closest: we redraw it to your measurements, in the marble or stone you prefer, and send you the design and the quotation free of charge.

Masonry kitchen in aerated concrete, bricks or plasterboard: the differences

The difference between aerated concrete, hollow bricks and plasterboard lies in weight, finished thickness and the way each one reacts to water. Clay brick is the most traditional and the heaviest; aerated concrete is light, which is why the guides recommend it in flats, where the floor slab must not be loaded; plasterboard is fast but is not real masonry. The mortars, adhesives and finishes of all three suffer from the steam of the sink and the heat cycles of the oven.

MaterialTypical partition thicknessBinderWorth knowing
Hollow clay bricks or clay tiles8-10 cm finished (7 cm tiles: 8-9 cm once plastered)Cement mortarWeight on the floor slab; hollow bricks hold moisture and encourage mould; brick expands as it absorbs water while the mortar shrinks
Aerated concrete (Gasbeton, Siporex)Blocks from 5 to 20 cm; 8-10 cm in practiceThin-bed adhesiveLess prone to mould than hollow bricks, but porous: it must be plastered, with a specific lime-based plaster, and protected from damp; adhesive, plaster and finish remain sensitive to water and heat
Plasterboard or plywood on a frame5-8 cmScrews, filler, glueNot masonry: a light clad structure; it must be kept away from water and from the load of a heavy worktop
Dry-laid refractory stone blocks (Michelessi)Dimensioned in the design; blocks cut to size in our workshopNone: mechanical interlockNo mortar to shrink or crumble; every block can be taken out and put back

The design before the bricks: dimensions, heights and lost space

A masonry kitchen is designed before the blocks are bought, because once the mortar is laid there is no going back. The reference dimensions are those of the guides for designers: finished worktop 85-95 cm from the floor, clear openings of 60 cm for base units and built-in appliances, at least 30-40 cm free on each side of the hob. Every vertical partition takes up 8-10 cm: on a long wall you lose at least 50 cm of storage. That is why the guides advise against masonry in small kitchens. For the full dimensions and for linear, corner, island and peninsula layouts, read the guide to designing a masonry kitchen and the page on masonry kitchen layouts.

How to build a masonry kitchen step by step

Building a masonry kitchen step by step means following a fixed order: services, partitions, worktop base, drying, finishes, doors. A traditional build documented by an interiors magazine took about two weeks of work, with waiting days between one stage and the next because mortar, screed, plaster and resin must dry.

  1. Setting out. Partitions, openings and the positions of sink, hob, oven, fridge and dishwasher are marked on the floor and the wall, using the dimensions from the manufacturers' data sheets.
  2. Services. Channels are cut for water, waste, gas and electricity (about four days in the reference build) and pipes and conduits are laid.
  3. Base. The plinth or the first course of blocks is built on the floor, perfectly level: every millimetre of error here shows up on the worktop.
  4. Partitions. The walls go up in brick and mortar, or in aerated concrete blocks and adhesive, checking plumb and square, with the appliance openings and their ventilation grilles.
  5. Worktop base. Clay slabs are laid across the partitions and a screed is poured, or a lightweight slab with mesh; it must dry before it is loaded.
  6. Plastering. Plaster and a gypsum or lime skim coat on the partitions (about two days), with corner beads where needed.
  7. Finish. Tiles, majolica or encaustic tiles with epoxy grout; or resin or microcement in two or three coats (about four days); then the worktop.
  8. Doors and seals. The joiner measures the finished openings, which are never perfectly square, and makes doors and drawers to fit; the joints between worktop, wall, sink and hob are sealed.
  9. Appliances and testing. Oven, dishwasher and fridge are built in, the services are connected and the air flow in the closed compartments is checked.

Services, channels and appliance ventilation

In a masonry kitchen the services stay buried in the walls: they must be designed with margin and made accessible. No ventilated void is needed behind the appliances, but the grilles and clearances given by the manufacturer are: an oven or a fridge shut in a compartment without air overheats, uses more energy and produces condensation. Under the sink, splashes, seepage through the grout and poor ventilation are the breeding ground of mould. Allow for removable plinths and panels in front of traps and connections: a small leak behind a closed base ruins the substrate and the floor before it becomes visible.

The finish: tiles, majolica, resin or microcement

The finish of a masonry kitchen is what protects it from water and steam, and it is also one of its most sensitive points. 10×10 cm tiles, majolica and encaustic cement tiles are the traditional choice: handsome, but full of grout lines, which collect dirt, turn yellow and, near the sink and the hob, must be epoxy. Resin and microcement remove the grout lines, but they are rigid finishes spread over a structure that moves with heat and damp: on a substrate that flexes they can crack, and exposed cement must be re-sealed every two or three years. A stone worktop, on the other hand, is a single element with few grout lines: on the marbles page you will find the materials suited to the kitchen.

Masonry kitchen with Ikea units or DIY-store carcasses

A masonry kitchen with Ikea units is a hybrid: masonry, or faux-masonry, partitions acting as the container, and inside them modular base units, drawers and deep drawers from a large retailer. It works on one condition: that the openings are built to the exact dimensions of the modules, with no room for error, because an out-of-square partition will not let a drawer open. Many "masonry kitchens" from the big brands are in fact furniture in clad plywood or plasterboard, and some makers openly declare them "faux masonry": we cover that on the faux masonry kitchen page.

How long it takes and the most common DIY mistakes

A traditional build documented by an interiors magazine took about two weeks, with the house without a kitchen and full of dust. The most common mistakes, drawn from the trade guides:

  • buying the appliances after building the openings: a built-in oven has its own dimensions and will not adapt;
  • partitions too thin or out of plumb, not sized for the weight of a stone worktop;
  • services buried without inspection panels and closed compartments without ventilation grilles;
  • loading the screed or finishing the plaster before they are dry: shrinkage continues under the finish and can open cracks;
  • using rapid-set or high-strength cement near an oven or barbecue, because it does not let the materials expand;
  • forgetting the weight: walls, screed, tiles and worktop bear on the floor slab, and in a block of flats this must be checked.

To understand what drives the cost of a masonry kitchen, built by you or by a craftsman, read the page how much a masonry kitchen costs.

What happens to a masonry kitchen after five years

After a few years a traditional masonry kitchen can show the signs of three causes, the same ones that weigh on every DIY build:

  • Heat: mortar, screed and plaster keep shrinking for years as they dry and, next to the oven, the materials expand by different amounts with every cooking session; rigidly bonded, they split each other.
  • Water: seepage through the grout swells the plaster, lifts the finish and, in closed compartments, brings condensation and mould.
  • Frost: outdoors the water in the pores freezes and widens the crack with every cycle.

The figures, the sources and the full comparison with refractory stone are on the page masonry or refractory stone.

Why Michelessi does not build in masonry

Michelessi does not build kitchens in masonry because mortar, cement and plaster are the materials that heat and damp wear out, and because a mortared kitchen is altered and repaired only with difficulty, often by demolishing. What you call a masonry kitchen, we build in refractory stone: blocks cut in our workshop in Aprilia and locked together dry, with no mortar and no cement, with a worktop in marble or stone and doors in wood. The look is the same: partitions, niches, the oven on show, a solid worktop; what changes is what lies beneath. Refractory stone is made for heat: manufacturers declare a resistance above 1,000 °C; alumino-silicate refractories for ovens reach 1,100-1,200 °C. A home kitchen never reaches those temperatures, but it is the margin that counts. A dry joint has no mortar to shrink or crumble, and no screed or plaster in which water can be trapped; and a block laid dry can be slid out and put back.

On the subject of this page, DIY, the difference shows in three rows:

What mattersMasonry (brick or aerated concrete, mortar, plaster)Faux masonry (clad panels)Dry-laid refractory stone (Michelessi)
Building workWet and dusty: about two weeks in a documented caseDry assembly, no wet workDry assembly by our own team, no mortar in the house
DryingMortar, screed, plaster and resin must dry between one stage and the nextLittle or none: dry assemblyNone: the assembly brings no water into the house
Repairs and changesOften demolitionDismantlingSlide the block out and put it back

The full table, with heat, water, lifespan and sources, is on the page masonry or refractory stone.

How we build without masonry: dry-laid refractory stone blocks

We start with a free site survey and 3D design in Rome, Latina and the whole of Lazio, cut blocks and worktop in the Aprilia workshop and lay them dry with our own team: the blocks lock together as in dry-stone walls, an art that UNESCO added in 2018 to its list of intangible cultural heritage (it is the dry-stone walling technique that is protected, not kitchens). No mortar, no screed, no drying days; the worktop is in marble, travertine, granite or sintered stone, the doors in solid or lacquered wood, with the hinges and finishes of the page doors, hinges and finishes. The five steps, from the survey to the assembly, are explained in full on the masonry kitchens page. We install with our own team throughout Italy and also follow projects abroad.

For indoors, our Francesca indoor kitchen follows the same logic: refractory stone block structure, marble worktop, wooden doors. For outdoors, barbecues and wood-fired ovens have a structure of refractory stone blocks, with steel for the grates, sink and technical parts; in the oven the dome and the arch are in refractory bricks, laid according to the refractory manufacturer's instructions, and all the structure around them is dry-laid. We explain this on the outdoor masonry kitchen page and, for the two most searched cases, on the pages about the masonry barbecue and the masonry wood-fired oven; for them too the first firing must be slow. The other questions on DIY, materials and permits are on the page masonry kitchens: questions and answers; the section starts from the masonry kitchens page.

The quotation is free: request it here.

How a traditional masonry kitchen is built, step by step (and how Michelessi builds without masonry)

  1. Design and dimensions
    Draw the kitchen in plan with the worktop at 85-95 cm from the floor, 60 cm openings and 8-10 cm partitions; choose the built-in appliances straight away, because the openings are built to their dimensions.
  2. Setting out and services
    Mark partitions and openings on the floor and the wall; cut the channels for water, waste, gas and electricity and lay pipes and conduits before closing anything up.
  3. Level base
    Build the plinth or the first course of blocks perfectly level and square: every error at the base shows up on the worktop.
  4. Partitions
    Raise the walls in brick and mortar or in aerated concrete and adhesive, plumb, leaving the appliance openings with the ventilation grilles the manufacturer requires.
  5. Worktop base
    Lay the clay slabs across the partitions and pour the screed, or a lightweight slab with mesh; let it dry before loading it.
  6. Plaster and skim coat
    Plaster and skim the partitions (lime-based on aerated concrete), with corner beads where needed; wait for complete drying.
  7. Finish
    Lay tiles, majolica or encaustic tiles with epoxy grout, or resin or microcement in two or three coats; then the worktop.
  8. Doors, seals, appliances
    Have the joiner measure the finished openings for made-to-measure doors and drawers; seal the joints exposed to water; build in and connect the appliances, with inspection panels in front of the connections.
  9. How Michelessi builds without masonry: dry-laid refractory stone blocks
    Site survey and 3D design; blocks and worktop cut in the Aprilia workshop; dry assembly by our own team, with no mortar, no cement and no drying days; worktop in marble or stone; doors in wood. Every block slides out and goes back in.

Frequently asked questions

Frequently asked questions

Can you build a masonry kitchen yourself?

Yes, but with care: the guides point to brick masonry with mortar as the hardest to do alone, while aerated concrete blocks, light and joined with a thin layer of adhesive, are simpler to lay. What cannot be improvised is the work on gas, electricity and drains, and the cutting of the stone worktop, which belongs to a stonemason.

How long does it take to build a masonry kitchen?

A traditional build documented by an interiors magazine took about two weeks: four days for channels and services, two for the skim coat, four for the resin, plus the drying times of mortar and screed. A structure of dry-laid refractory stone blocks has no drying days: the assembly brings no water into the house.

Aerated concrete or hollow bricks for a masonry kitchen: which to choose?

Aerated concrete (Gasbeton, Siporex) is light and less prone to mould than hollow bricks, but it is porous: it must be plastered and protected from damp. Its lightness is why it is recommended in flats, where the floor slab must not be loaded; clay brick is heavier. Both need mortar or adhesive, plaster and a finish, and these finishes suffer from the heat cycles of an oven.

How thick should the partitions of a masonry kitchen be?

The guides for designers give aerated concrete blocks from 5 to 20 cm; in practice finished partitions measure 8-10 cm, and 7 cm clay tiles reach 8-9 cm once plastered. A stone worktop is heavy: the thickness and soundness of the partitions must be sized before building. Every partition takes storage away: on a long wall at least 50 cm are lost. In Michelessi's refractory stone blocks the thickness is dimensioned in the design.

Is a ventilated void needed behind the appliances in a masonry kitchen?

No: no void is built behind or under oven, fridge and dishwasher, but the ventilation grilles and clearances in the manufacturer's data sheet are required. A closed compartment without air makes the appliance overheat, raises consumption and produces condensation. The ventilation opening must never be closed for the sake of looks.

Can a masonry kitchen be built in plasterboard?

Yes, with moisture-resistant panels on a frame or in marine plywood, then clad to look like a wall: it is quick and light, but it is not masonry and must be kept away from water and from the load of a heavy worktop. It is in substance faux masonry. The three solutions differ like this: real masonry is brick or blocks bonded with mortar; faux masonry is a light structure of clad panels; our refractory stone is made of blocks locked together dry, without mortar.

Can a masonry kitchen be built with Ikea units?

Yes: it is a much-searched hybrid, with partitions acting as the container and modular base units, drawers and deep drawers fitted into the openings. It only works if the openings are built to the exact dimensions of the modules, with no room for error, because an out-of-square partition stops the drawers opening. The same applies to doors bought separately.

Tiles, resin or microcement: which finish for a masonry kitchen?

Tiles and majolica are traditional but full of grout lines, which must be epoxy near water and the hob; resin and microcement remove the grout lines but are rigid finishes on a substrate that moves, so they can crack, and exposed cement must be re-sealed every two or three years. A stone worktop cut to size has few grout lines and is not a finish spread over a substrate.

Why does a masonry kitchen crack?

Not always, but the weak points are well known: mortar, screed and plaster shrink as they dry for years and, held back by the wall and the tiles, can tear; next to the oven the materials expand by different amounts with every cooking session and, being bonded, can split each other. In fireplaces and barbecues, above 300-400 °C, ordinary cement mortar crumbles. Water entering through the grout swells the plaster and lifts the finish.

Can a masonry kitchen be dismantled or altered?

A traditional one usually cannot: doors, drawers and appliances come out; partitions and finishes may need demolition. That is why the guides recommend removable panels and plinths in front of the services. A structure of dry-laid refractory stone blocks opens and closes again: a block slides out and goes back in without demolition.

What is the difference between a masonry kitchen and one in dry-laid refractory stone?

The look is the same: partitions, niches, a solid worktop and wooden doors. The structure changes: masonry is brick or aerated concrete bonded with mortar and clad; ours is made of refractory stone blocks cut in Aprilia and locked together without mortar or cement, with a marble worktop. Without mortar there is no binder to shrink or crumble with heat, and every block can be replaced on its own.

Does Michelessi survey the room even for someone who meant to build the kitchen alone?

Yes. The survey and the quotation are free in Rome, Latina and the whole of Lazio: we measure the room, check services and appliances and prepare the 3D design of the kitchen in refractory stone blocks. If you already have a drawing or a list of appliances, we start from those. We install with our own team throughout Italy and also follow projects abroad.

Call us WhatsApp